Looking for ways to strengthen your muscles and bones? Here are some easy and effective yoga poses that can help improve your bone health.
We don’t all spend a lot of time thinking about strengthening our bones, but it’s important nonetheless! You may think that you only need to think about your bones when you’re older, but you need to start now! You need to start now to avoid any repercussions later in life, and you can do that with yoga! Not only does yoga help you relax, it also strengthens your bones. Yoga uses your body weight and gravity to work your muscles and bones. If you want to prevent osteoporosis in your later life, give yoga a try. Here are some easy and effective yoga poses for better bone health.
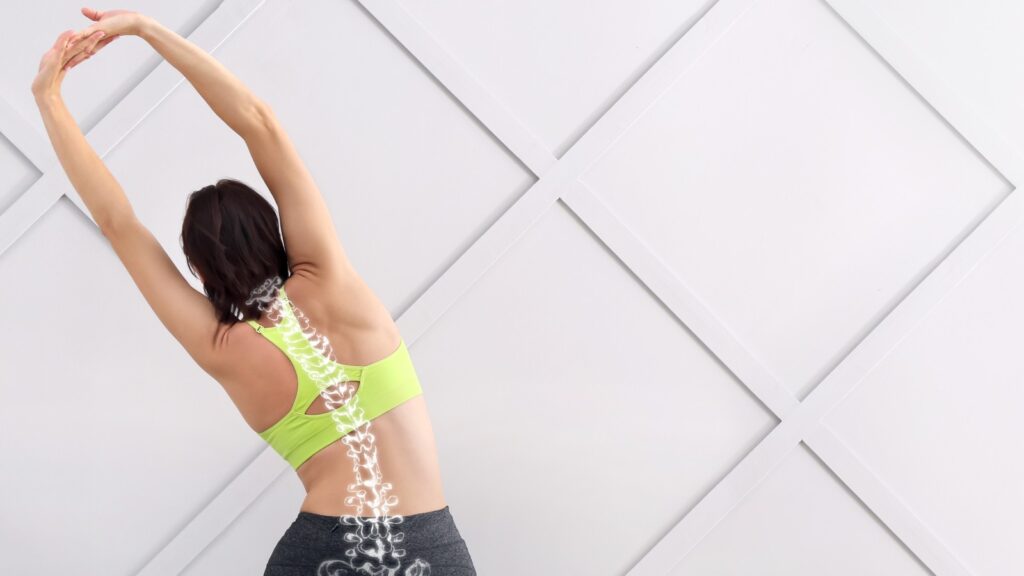
How Do Yoga Poses Improve and Strengthen Your Bones?
Yoga, an ancient practice rooted in physical, mental, and spiritual well-being, offers a holistic approach to improving bone health. Here’s how it works, as explained by yoga expert Himalayan Siddhaa Akshar.
1. Weight-bearing yoga poses
Regular weight-bearing activities, including yoga, can significantly increase bone mineral density and reduce the risk of osteoporosis, according to a study published in the Journal of Osteoporosis. International Journal of Yoga. When you practice weight-bearing yoga poses, your bones are put under mechanical stress. This stress signals the body to produce more bone cells, which leads to increased bone density. This is especially beneficial for preventing osteoporosis, a disease characterized by weak, brittle bones.
2. Strengthens muscles
Yoga can effectively increase muscular strength and endurance, according to a study published in the Journal of Ayurveda and Integrative MedicineStronger muscles can better support bones, reducing the risk of fractures. When you strengthen the muscles surrounding your bones, you create a protective layer that helps protect bones from injury. Additionally, stronger muscles can help improve balance and coordination, reducing the risk of falls.
3. Improves balance and stability
Yoga poses that require balance and coordination, such as tree pose and warrior III pose, can help strengthen muscles and improve the nervous system’s ability to control balance. This can significantly reduce the risk of falls, which are a leading cause of bone fractures in older adults. A study published in the Slovenian Journal of Public Health found that the four-week yoga program helped individuals improve their balance, body composition and social well-being.
You may also like


4. Improves flexibility
Regular yoga practice can improve the body’s flexibility and balance, according to a study published in the International Journal of YogaBy improving flexibility, yoga allows muscles and joints to move fully. This reduces pressure on bones and helps prevent injuries. Increased flexibility can also help improve posture and alignment, improving bone health.
5. Reduces stress and anxiety
According to a study published in The Guardian newspaper, regular yoga practice improves mental health by increasing concentration and reducing stress and anxiety. International Journal of Yoga. A study published in the UOEH Journal Studies have also shown that chronic psychological stress can lead to bone loss and deterioration of bone quality. Yoga practices, such as deep breathing and meditation, can help reduce stress hormones, which can negatively impact your bone health. Managing stress can help strengthen and maintain your bones.

7 Best Yoga Poses for Better Bone Health
Here are some easy and effective yoga poses to improve and strengthen your bones as recommended by the expert.
1. Tree Pose or Vrikshasana
- Step 1: Begin in mountain pose or tadasana, standing with your feet together and your arms relaxed at your sides.
- Step 2: Shift your weight to your left foot and lift your right foot. Place the sole of your right foot against the inside of your left thigh, just above the knee.
- Step 3: Once your foot is in the correct position, engage your core muscles and find your balance.
- Step 4: Keep your eyes fixed on a fixed point in front of you.
- Step 5: Bring your hands together in front of your chest in a prayer position.
- Step 6: When you feel more stable, extend your arms upward, reaching towards the sky.
- Step 7: Hold the pose for several breaths, focusing on maintaining your balance and body alignment.
- Step 8: Release the pose and repeat on the other side.
This standing balance posture strengthens the legs and improves overall balance.
2. Warrior Pose or Virabhadrasana
- Step 1: Begin in mountain pose or tadasana, standing with your feet together and your arms relaxed at your sides.
- Step 2: Step your right foot back about 3 to 4 feet, rotating it 90 degrees to the right.
- Step 3: Bend your front knee until it is directly above your ankle.
- Step 4: Extend your arms out to the sides, parallel to the floor, palms facing down.
- Step 5: Look forward, over your front hand.
- Step 6: Hold the pose for several breaths, making sure to keep your front knee aligned with your ankle and your back heel lifted.
- Step 7: Release the pose and repeat on the other side.
This standing posture strengthens the legs, hips and core, which are important for bone health.
3. Chair Pose or Utkatasana
- Step 1: Begin in mountain pose or tadasana, standing with your feet together and your arms relaxed at your sides.
- Step 2: Bend your knees and lower your body as if you were sitting on a chair. Your thighs should be parallel to the floor.
- Step 3: Extend your arms overhead, palms facing each other.
- Step 4: Hold the pose for several breaths, keeping your back straight and your knees aligned with your ankles.
- Step 5: To release the pose, slowly straighten your legs and return to Mountain Pose.
This standing posture works the legs and gluteal muscles, promoting bone density in the lower body.
4. Downward Facing Dog or Adho Mukha Svanasana
- Step 1: Start on all fours with your wrists directly under your shoulders and your knees directly under your hips.
- Step 2: Exhale and press your hands into the mat, lifting your hips up and back.
- Step 3: As you lift your hips, straighten your legs as much as possible. Your heels may not touch the floor at first, and that’s okay.
- Step 4: Continue pressing your hands into the mat and reaching your heels toward the floor.
- Step 5: Spread your fingers wide and press down on your fingertips.
- Step 6: Press your palms evenly into the mat, creating a solid base.
- Step 7: Keep your spine long and reach your crown toward the ceiling.
- Step 8: Let your head hang freely between your arms.
This inversion pose strengthens the arms, shoulders, and back, while engaging the leg muscles.
5. Bridge Pose or Setu Bandha Sarvangasana
- Step 1: Lie on your back with your knees bent and your feet flat on the floor, hip-width apart.
- Step 2: Place your hands on the floor next to your hips, palms facing down.
- Step 3: Inhale and press your feet and hands into the floor, lifting your hips off the floor.
- Step 4: Interlace your fingers under your pelvis and press your arms down to lift your hips higher.
- Step 5: Keep your neck neutral, avoiding any tension or compression.
- Step 6: Hold the pose for several breaths, breathing deeply and evenly.
- Step 7: To release the pose, gently lower your hips toward the floor, one vertebra at a time.
This backbend posture strengthens the muscles in your back, hips and legs and can help improve bone density in your spine.
6. Plank Pose or Chaturanga Dandasana
- Step 1: Start in downward dog pose.
- Step 2: Walk your feet toward your hands, keeping your knees directly under your hips.
- Step 3: Lower your body toward the floor, keeping your arms straight and your body in a straight line from your head to your heels.
- Step 4: Engage your core muscles to maintain a strong, stable posture.
- Step 5: Hold the pose for several breaths, focusing on keeping your body in a straight line.
- Step 6: To release the pose, return to downward dog pose.
This core-strengthening pose engages the muscles in your arms, shoulders, and abdomen, which are important for overall bone health.

7. Camel Pose or Ustrasana
- Step 1: Begin sitting on your knees with your back on your heels.
- Step 2: Place your hands on your hips, palms facing in.
- Step 3: Inhale and arch your back, lifting your chest toward the ceiling.
- Step 4: Reach your hands back, grabbing your heels or ankles.
- Step 5: Continue arching your back, opening your chest and shoulders.
- Step 6: Press your hips toward the floor to avoid straining your lower back.
- Step 7: Hold the pose for several breaths, breathing deeply and evenly.
- Step 8: To release the pose, slowly lower your torso back to the starting position.
This backbend pose stretches the front of the body, including the hip flexors, which can help improve posture and bone health.
Side Effects of Yoga Poses on Bone Health
Although yoga is generally safe, there are some potential side effects to be aware of:
- Muscle pain or tension due to unfamiliar movements.
- Joint pain or instability, especially in people with existing joint problems.
- Dizziness or lightheadedness, especially during inversion postures.
- Increased risk of fractures in people with severe osteoporosis.
It’s important to start slowly, listen to your body, and work with a qualified yoga teacher, especially if you have underlying health conditions or concerns about your bone health.
#Yoga #bones #poses #prevent #osteoporosis