Yoga can help reduce the neck hump or dowager’s hump, which is a curve at the base of the neck. This condition can cause back pain, headaches and extreme fatigue.
Cervical hump or dowager’s hump is a condition that people often associate with old age. The visible hump at the base of the neck may be linked to osteoporosis, a condition that leaves bones weak and brittle. It can also be due to poor posture, which can cause an abnormal curvature of the upper spine to form. Like most people, you have to spend a lot of time in front of computer screens and other gadgets. This can cause a neck hump, so staying away from screens is essential. While a break would be helpful, incorporating yoga to reduce neck hump can also affect the quality of your life.
What is a neck bump?
A cervical hump or dowager’s hump, medically called kyphosis, is the accumulation of fat or soft tissue at the back of the neck. People with a neck hump often appear to have a hump at the base of the neck. Besides age, this is often due to poor posture, a sedentary lifestyle, or spending too much time hunched over devices like computers and phones.
If left untreated, it can lead to an increased risk of falls, functional limitations, musculoskeletal alterations and overall quality of life, according to a 2023 study published in the Journal of Medicine and Life. Most of the time, postural realignment and exercises strengthening the back and neck muscles can correct this problem.
Yoga to reduce a neck hump
“Yoga is an excellent method to treat and minimize the development of a cervical hump,” says yoga expert Dr. Hansaji Yogendra. In a 2002 study published in the American Journal of Public HealthThe use of yoga in women with dowager’s hump has been shown to be safe. Researchers not only found it acceptable, but also concluded that it could improve posture.
You may also like


Here are some poses to reduce neck hump:
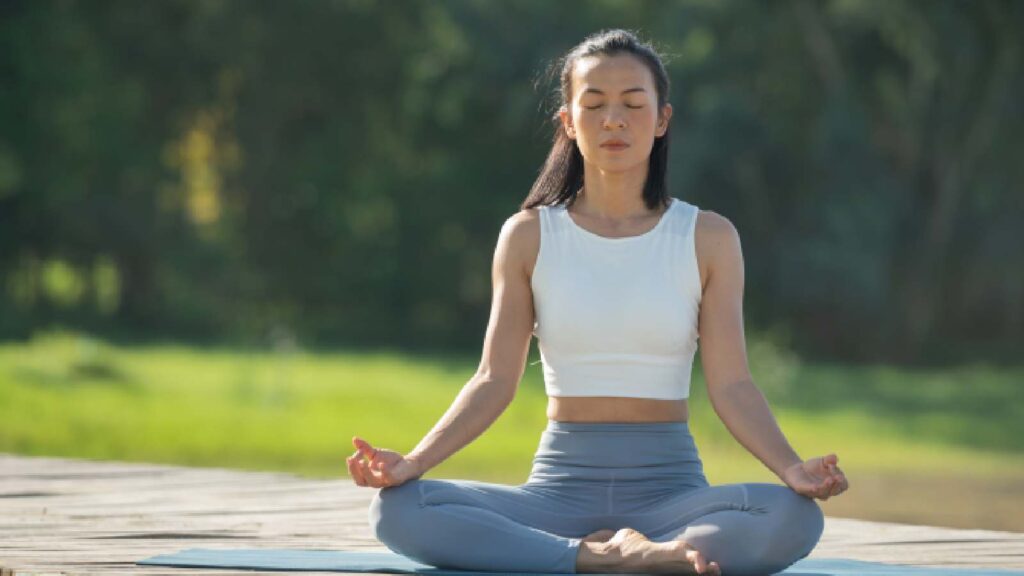
1. Padmasana (Lotus Pose)
- Sit on the floor with both legs in front of you.
- Bend your right leg, place the heel at the root of your left thigh with the sole facing up.
- Repeat the steps with your left leg, crossing your ankles.
- Keep your spine straight, close your eyes and focus on your breathing while doing lotus pose.
2. Sthitaprarthanasana (standing yogic prayer pose)
- Stand with your feet together.
- Fold your hands in Namaskar Mudra or prayer position with the spine straight, at chest level.
- Close your eyes, relax your body and breathe easily.
3. Sukhasana (easy pose)
- Sit with your legs straight to do sukhasana.
- Bend one of your legs and place its heel under the opposite thigh, and repeat on the other side of the body.
- Cross your legs and place your hands on your knees while keeping your spine straight.
- With your eyes closed, pay attention to your breathing.
4. Vajrasana (lightning bolt pose)
- Kneel on your yoga mat, with your knees and toes touching, and sit back on your heels.
- Keep your spine straight, your shoulders relaxed, place your hands on your knees and focus on your breathing.
5. Talasana (palm tree pose)
- Stand straight with your feet parallel and one foot apart.
- Raise your arms to the limit and keep them parallel to each other with your palms facing inward.
- Stretch your limbs upwards then slowly lower your arms.
6. Yastikasana (stick pose)
- Lie on your back with your legs together and your arms at your side.
- Extend your toes, raise your arms above your head in an arc.
- Hold this tense position for a few seconds then relax.

7. Chakrasana (wheel pose)
- To do wheel pose, lie on the yoga mat on your back and keep your knees bent.
- Place your hands near your ears. Your palms should be facing down and fingers pointing toward your shoulders.
- Push your body halfway up and rest the crown of your head on the yoga mat without putting any weight on your head.
- Make sure your arms and elbows are facing each other, then begin to arch your mid and upper back.
- While supporting your hands and feet, lift your body.
- You can slightly bend your knees and straighten your arms.
- Your head should hang freely.
- After a few seconds, lower your body.
8. Ushtrasana (camel pose)
- The first step in camel pose is to kneel on the floor with your toes curled and your hands on your lower back.
- Lean back and stretch your arms. You create an arch in your back, but don’t let your neck hang.
- Hold the pose for a few seconds and slowly straighten up.
9. Marjariasana-Bitilasana (cat-cow pose)
- Place your hands and knees on the mat in a tabletop position.
- Drop your stomach and lift your head and chin toward the sky, arching your lower back into cow pose.
- Drop your chin to your chest and round your spine into cat pose.
- Alternate between these two positions for a few seconds.
10. Natarajasana (Lord of Dance Pose)
- Stand with your feet together.
- Bend your right knee and place your right hand on your ankle.
- Stretch your right leg back and bring your left arm forward.
- Hold it then return to the first step.
“These yoga poses stimulate and strengthen the muscles of the neck, upper back, and shoulders, and help maintain better posture,” says Dr. Hansaji. Habitual practice of these postures can develop proper functioning of the spine and neck, reducing slumped and forward leaning postures, which are major causes of cervical hump.
“But rounding the shoulders should be avoided, as this causes even more stress on the upper back and neck, thus defeating the intention of the postures,” says Dr. Hansaji. Additionally, straining your neck and doing stretches beyond your neck’s capacity can make things worse and even lead to injury.
A cervical hump may be closely related to your lifestyle. But yoga can help reduce neck hump, so choose the right poses. However, it is best to consult your doctor to avoid any problems.
#Yoga #neck #hump #poses #reduce #pain